It was my sons 1st Birthday on the weekend and he absolutely loves HOOT THE OWL so the choice of what cake to make was made easy.
I asked our members for some blue and orange inspiration and any photos of past cakes. Jenny Bishop posted a photo of her hoot the owl cake and I used this to base my cake off. Thank you Jenny your cake was such a lifesaver.
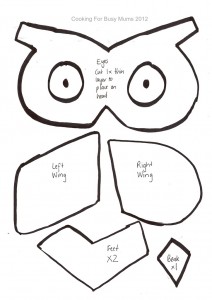
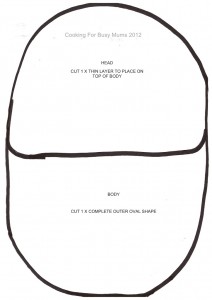
I started out by free-hand drawing Hoot to match the size of my baking dish. Here is the template in a downloadable Jpg file. You can reduce or enlarge by using a photocopier and decreasing or increasing the %size.
 |
| CLICK HERE TO DOWNLOAD |
 |
| CLICK HERE TO DOWNLOAD |
BAKING THE CAKE AND CUTTING
I then baked my cake. Now I am normally a start from scratch cake person but when it comes to Birthday cakes I allow my self to cheat and use a packet cake mix. I use the 67cent Butter Cake Mix Homebrand Brand. This cake requires 4 packets. My reasoning for this is:
- I want to get the cake baked as quick as possible as I know I have a lot of work ahead of me.
- I want it to be fool proof – I don’t want to be baking again
- It will spend a lot of time in or out of the fridge so it needs to withstand these conditions
- I prepared 2 packets together at a time and coloured one batch blue and one orange.
- Pour half the blue into one baking dish and then top with half the orange and repeat in another baking dish.
- Baking for approx 45 minutes or until cooked.
- Cool on wired tray and then place in the oven to cool completely and harden (making it easier to carve).
- Once it comes out of the fridge place the templates provided on the cake and cut with a serrated knife.
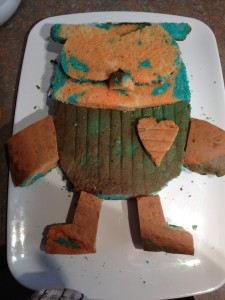
- Cut one of the cakes in half through the middle horizontally to create a piece for the head and eye section. This piece will need to be cut through to create to thin pieces (you can achieve this by using a piece of cotton).
- See here for assembly of the cake prior to icing.
- For the icing I chose to use fresh cream beaten with icing sugar and the food colouring.
- I used yellow and red combined to achieve the orange.
- To create the skin colour for the eye/eyebrow section I whipped straight cream uncoloured and then folded in a small amount of the whipped orange cream to tint.
- Ice the oval body shape completely in blue in place on the base you will be serving it on.
- Return to the fridge to set.
- Place the Head piece on to the body and ice with the blue.
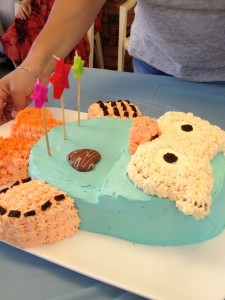
- Using a piping bag ice the wings and feet with orange.
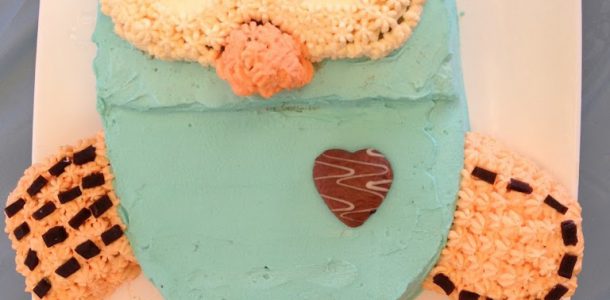
- Place the eye/eyebrow piece on to the head and ice with straight white whipped cream. Then pipe to form the eye socket section. Use the photo to guide.
- I used cut up licorice for the detailing.


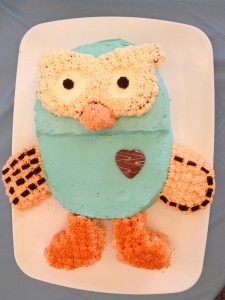








give me luck, I’m going to try and make this for my nieces 2nd birthday.
Good luck Leanne, the hardest part was keeping it in the fridge away from little fingers. I would love to see a photo when your done, feel free to send it to cookingforbusymums@gmail.com. Amanda